Connecting Node(s): Message Queues in practice
• • ☕️ 7 minute read
In my 'Connecting Nodes' article I discussed different options on how to connect your distributed backends. One of the most prominent methods is through the use of message queues. In this tutorial I will show how it is done with Node.js.
Recap
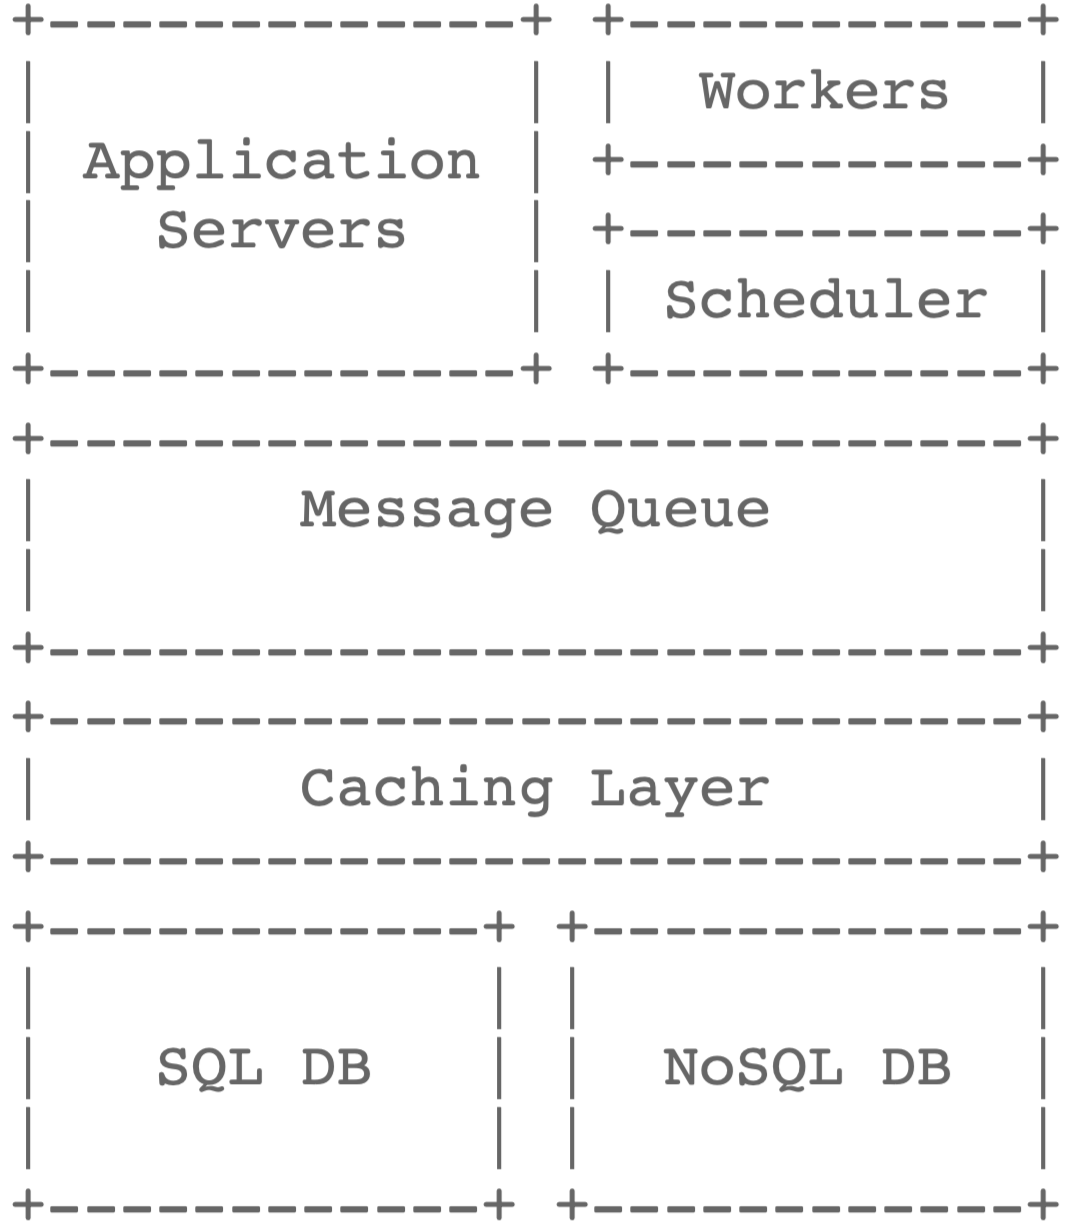
Traditionally backends often form a two-tier application. You have an application tier, which runs your application’s software, and then you have your database manager, which persists your data. Modern applications running in the cloud, however, are moving away from this traditional two-tier architecture towards a proper n-tier architecture, as mature applications may at some point start adding background processing that hands off of the application tier. These additional tiers provide alternative computing, storage, and process orchestration to handle the growing set of response needs. Independent processing components, often referred as workers, operate in the background. They often perform specific actions – stream processing, aggregate analytics, sending emails and notifications, creating a bridge or buffer between processes, or doing any sort of variable-length processing. In many cases, a message queue forms the backbone to help orchestration of these tasks, they are the fibres that tie distributed architectures together.
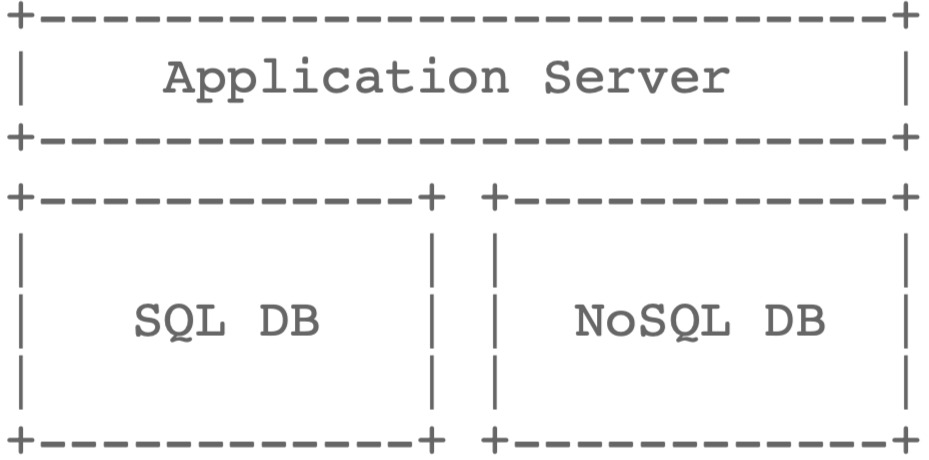
The difference between a two tier architecture and one leveraging a message queue can be visualised as:
In short we can summarize the advantages a message queue has to offer:
Decoupling: Feature rich applications may tend to transform in a monorepo whereby dependencies are becoming hard to manage and refactoring of specific components may cascade into unforeseen bugs. A good practice is to decouple code modules and even entire backends in order to maintain your sanity. By adopting the MQ, code repos can be completely split up, even running in separate Docker containers while still having the possibility of interacting. Rather than performing multiple functions within a single executable, multiple programs can exchange information by sending messages between processes, making them easier to test, debug, evolve and scale.
Resiliency: Many companies offer Service Level Agreements that incur high availability guarantees. Messaging Queues offer automatic failover and self healing facilities so that single point of failure is avoided.
Scalability: Under unforeseen circumstances the application may prove difficult to scale. By adopting a MQ, message queues make it possible to scale precisely where and when you need to. As your queues get longer with these incoming requests, you can distribute the workload across a fleet of consumers/workers. Producers, consumers and the queue itself can all grow and shrink on demand.
Performance: Message Queues offer a way of distributing workloads on multiple processors, therefore drastically shrinking processing times.
Graceful transitioning: When shifting towards new programming languages, an MQ can be leveraged to gradually interchange old components with new ones without breaking the backend as a whole.
Brokered and Brokerless
A brokered MQ has a mediator server which interconnects messaging nodes. In this article I will use one of my favourites: NATS. Apache Kafka and IronMQ are also good examples commonly used in practice. In a brokerless setting, communication depends on the adopted patterns. Nodes could directly connect to their counterparts in a P2P setting, or something totally different. One of the best brokerless messaging queues is ZeroMQ, which is extensively documented by its creator Pieter Hintjes in his book.
If we compare the performance of both solutions, we observe that NATS is capable of handling up to 7.000.000 messages per second off the shelf in total, on average 200.000 messages per second per messaging node in a 5 tier setup.
ZeroMQ has similar results (3.000.000 messages per second) when using 100Gbps Ethernet, however these metrics are node-2-node, so a brokerless setup clearly offers some performance benefits.
Worth noting is that we have to place these numbers in context, as a brokered setup offers more complex features such as decentralized security, self healing and disaster recovery. It is also easy to scale by just spinning up new NATS servers and connecting them to the already one, without interruption of service. It even allows for a leaf-node setup which is often preferred in IoT settings where distributed hubs collect the data and a central hub which aggregates it. ZeroMQ however is more flexible, and can be regarded more as a building block of messaging infrastructure, rather than it being an off the shelf solution. It allows for a very elegant and simple setups where the overhead from brokered setups is not required, or it could be used in more complex messaging patterns. Furthermore the CurveZMQ extension added an encryption layer on top of the TCP protocol for guaranteed security. In short, there is no better choice, experiment with both setups and see what works best for you. One of the reasons I favor these two is because of the many language bindings (almost every language you can think of is supported).
NATS
Let’s start with a brokered setup. We will deploy a NATS server and a dashboard with docker compose:
version: "3.4"

services:
  nats:
    image: nats
    expose:
      - "8222"
    ports:
      - "4222:4222"
    hostname: nats-server

  natsboard:
    image: chrkaatz/natsboard
    command: bin/natsboard --nats-mon-url http://nats:8222
    ports:
      - "3000:6000"
      - "3001:3001"
    depends_on:
      - nats
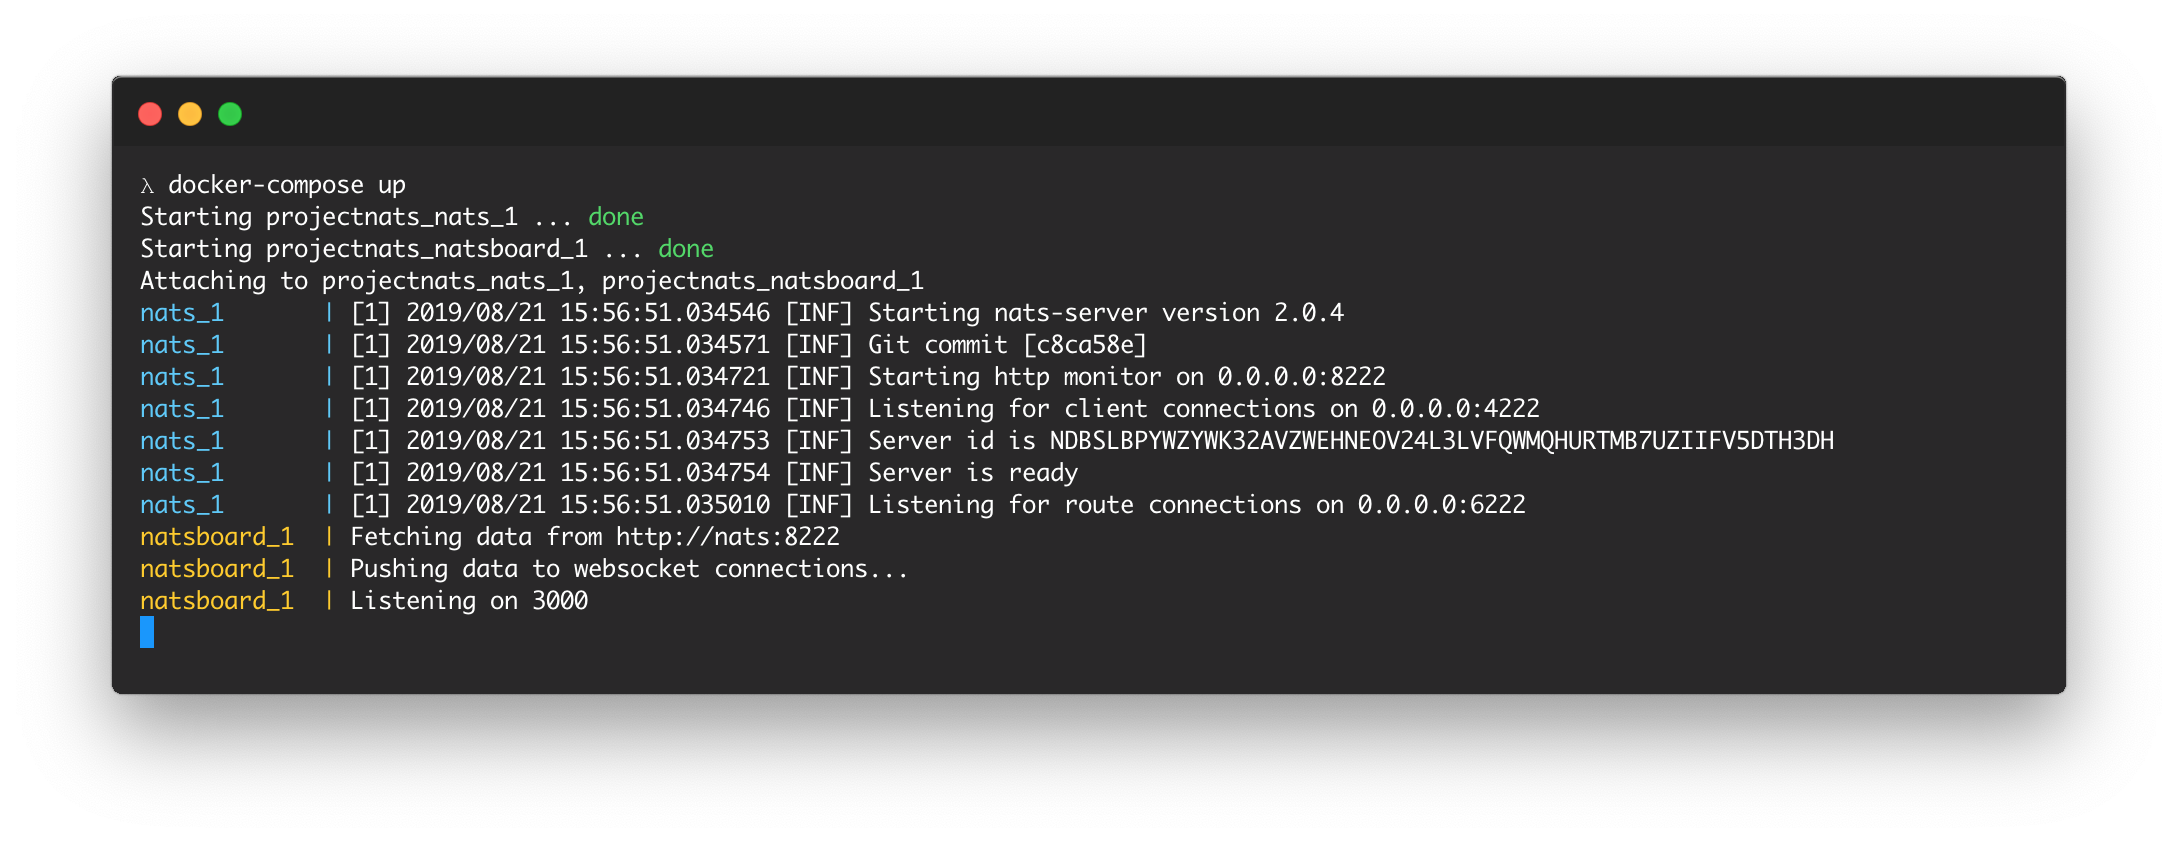
The deployment should look similar to the following output:
Next we can start with writing the code. Make sure the npm package nats is installed first! We will construct a simple PUB/SUB layout. We need some boilerplate code to set up our connection with the broker first. Since we have deployed and forwarded our broker on port 4222, we connect to it simply by specifying the url. Note that I included a json parameter in order to inform the server we’re passing JSON messages. This boilerplate is the same for both publisher and subscriber.
var nats = require("nats");

let nc = nats.connect({
  url: "tcp://localhost:4222",
  json: true
});

nc.on("error", function(err) {
  console.log(err);
});

console.log("Connected with: " + nc.currentServer.url.host);
Next we design our subscriber. This subscriber listens to node-updates as well as time messages. The second case is more advanced as it involves a reply to the requestor.
nc.subscribe("node-updates", msg => {
  console.log(msg);
});

nc.subscribe("timereq", (msg, reply) => {
  if (reply) {
    nc.publish(reply, new Date().toLocaleTimeString());
  }
});
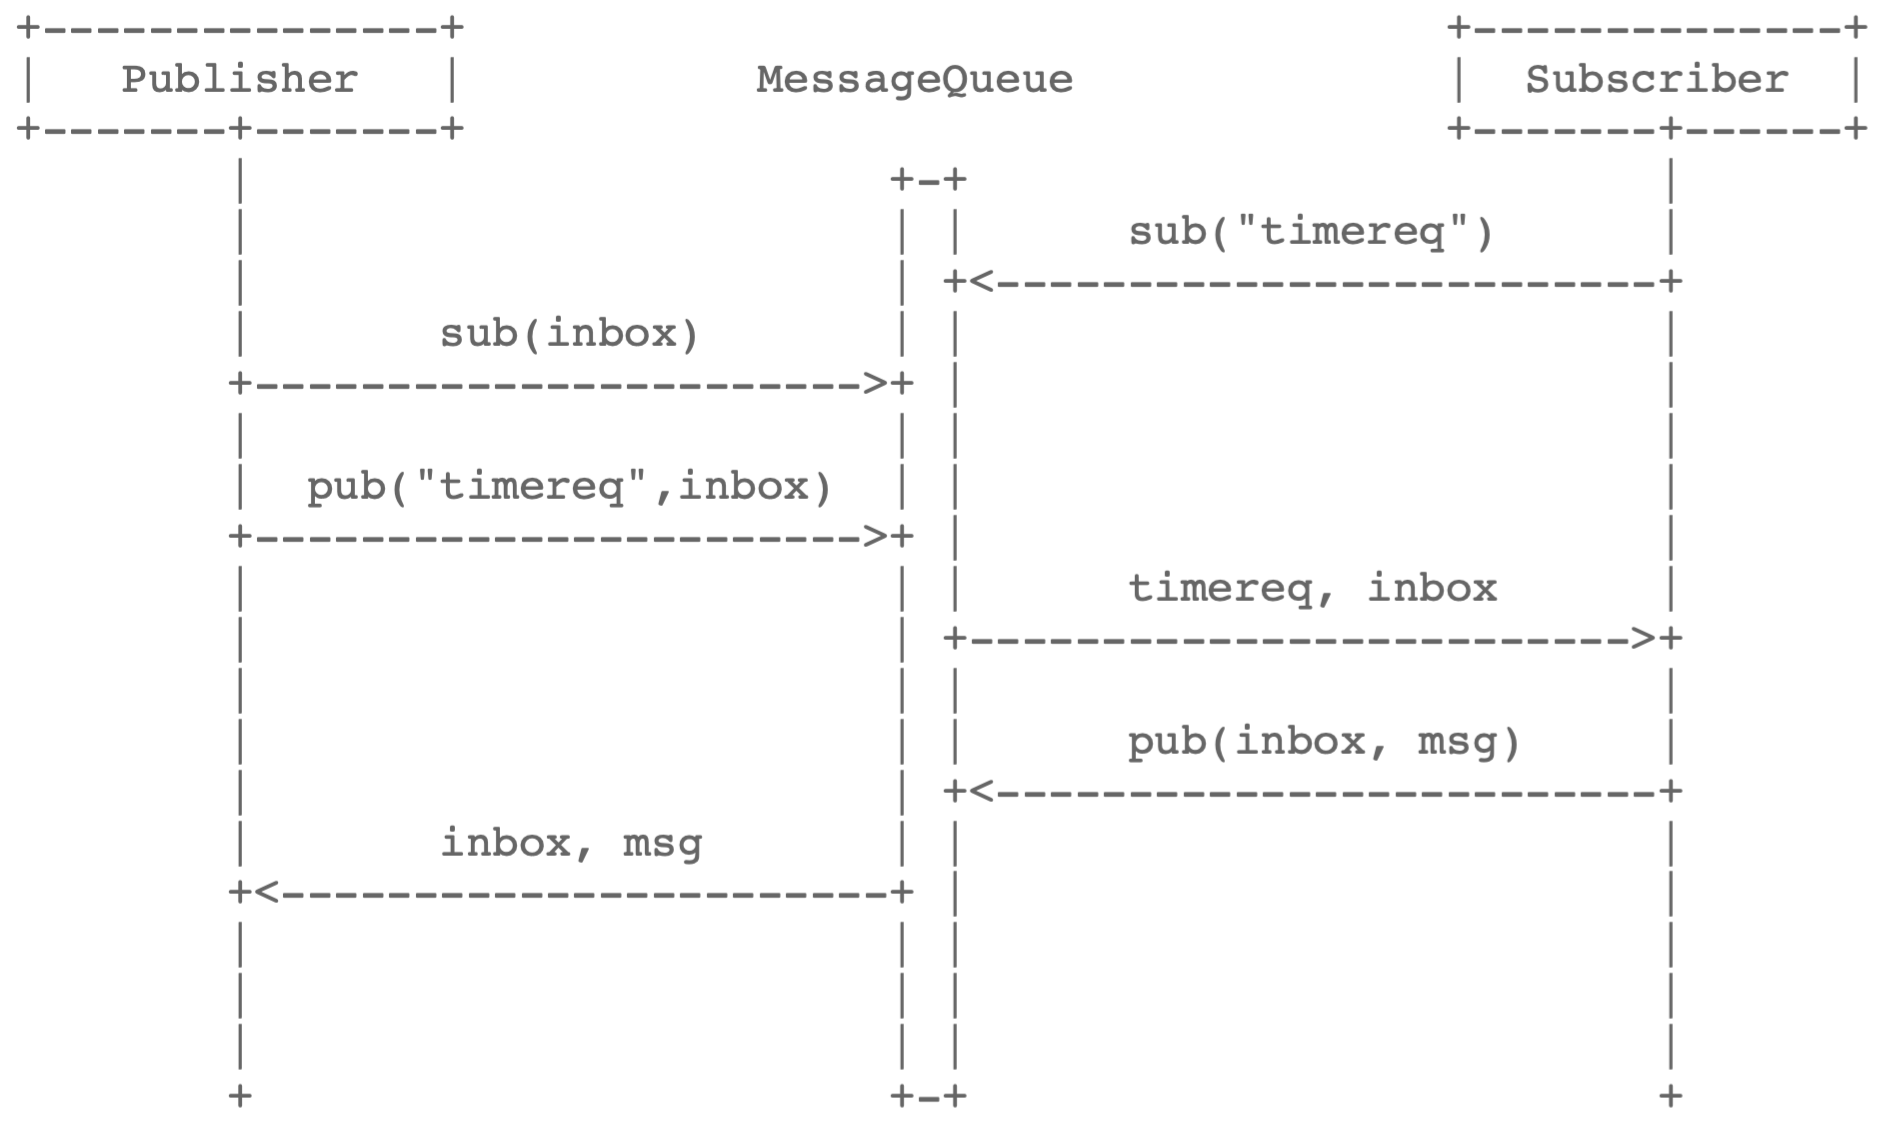
Next we have our publisher which posts a message on the node-updates channel and next publishes a time message (which is a request for the time). In order to succesfully receive back the time, it initiates an inbox, passes it to the MQ. When it arrives at a responder it has the option to publish back a reply on that inbox (as can be seen above). In order to receive the message, the publisher subscribes to the inbox-channel. The max parameter indicates that it will stop listening after the first reply arrives.
nc.publish("node-updates", { foo: "bar", answer: 42 });

let inbox = nats.createInbox();
nc.publish("timereq", {}, inbox);

nc.subscribe(inbox, { max: 1 }, msg => {
  console.log(msg);
});
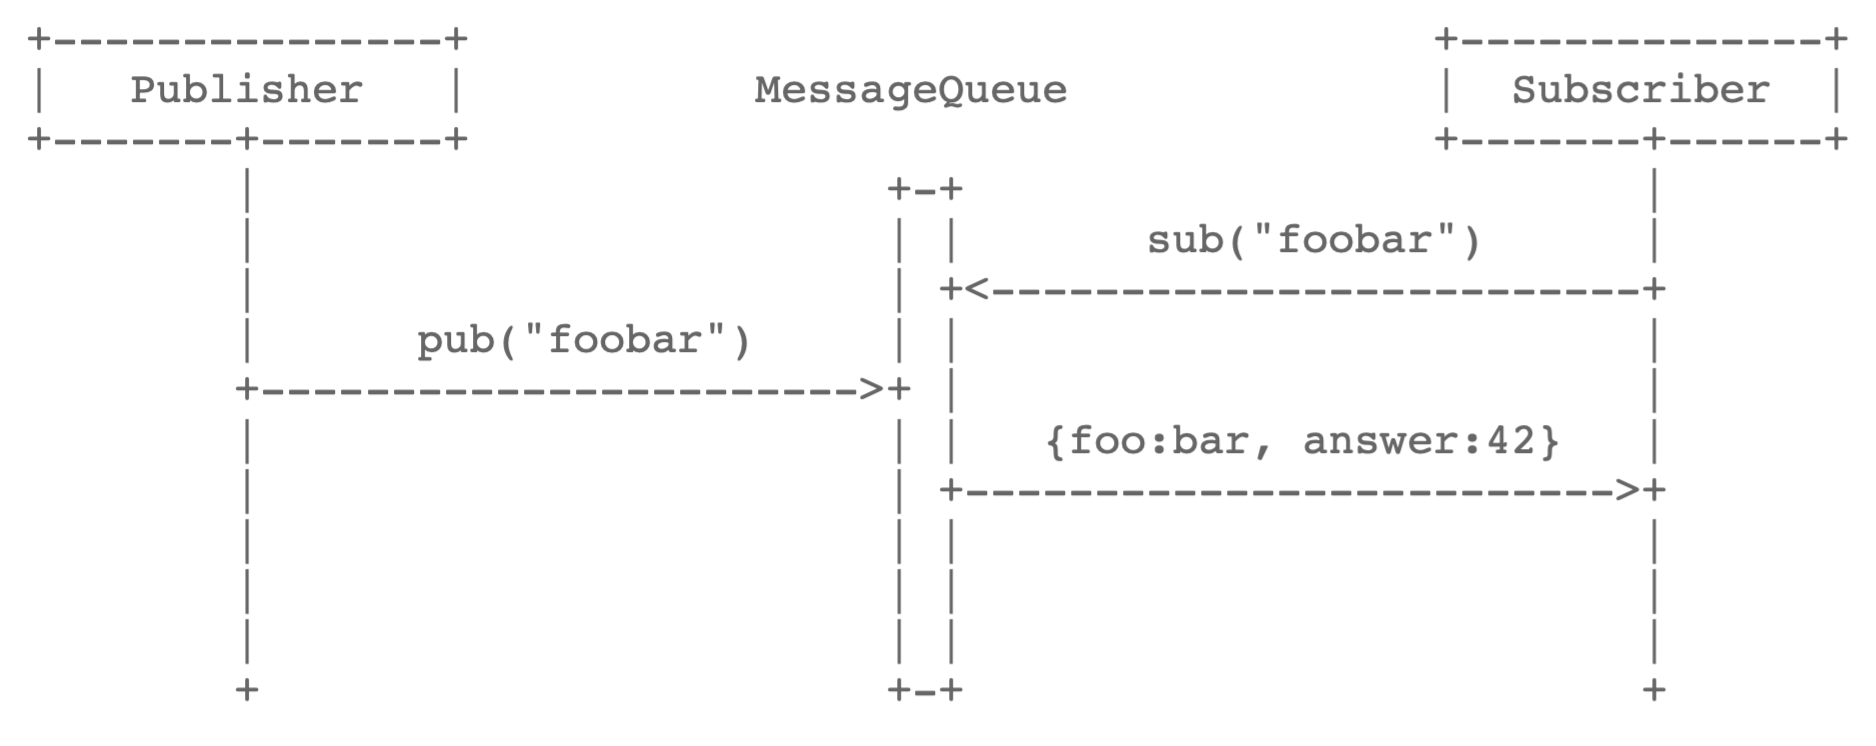
Each case can respectively be represented with the following sequence diagrams:
When running both scripts you can inspect the traffic in your dashboard at port 8222.
ZeroMQ
ZeroMQ is somewhat more easy to deploy as it does not involve any containerization (remember it needs no broker). Instead a messaging stub is needed in order to communicate over the so-called ZMQ-Sockets. This stub is included when installing the zeromq package from npm. I also like to combine ZMQ with Messagepack for JSON serialisation as it saves bandwidth.
A demonstration of the simple P2P PUB/SUB setup:
var msgpack = require("msgpack-lite");
var zmq = require("zeromq"),
  sock = zmq.socket("sub");

sock.connect("tcp://127.0.0.1:3000");
sock.subscribe("foobar");
console.log("Subscriber connected to port 3000");

sock.on("message", function(topic, message) {
  var data = msgpack.decode(message);
  console.log(data);
});
var msgpack = require("msgpack-lite");

var zmq = require("zeromq"),
  sock = zmq.socket("pub");

sock.bindSync("tcp://127.0.0.1:3000");
console.log("Publisher bound to port 3000");

setInterval(function() {
  var buffer = msgpack.encode({ foo: "bar" });
  sock.send(["foobar", buffer]);
  console.log("message sent");
}, 5000);
It is clear both NATS and ZeroMQ are easy-to-deploy solutions to a problem that is not-trivial. I will follow up this article with other solutions as well. Make sure to check out the code in my repository for more examples.